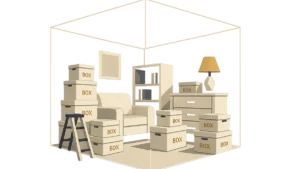


- Why Should You Store Furniture During a Home Renovation?
- Step 1: Decide What Actually Needs to Go Into Storage
- Step 2: Clean Your Furniture Before Storage
- Step 3: Disassemble What You Can
- Step 4: Don't Wrap Everything in Plastic and Forget About It
- Step 5: Keep Furniture Off the Floor
- Step 6: Choose the Right Furniture Storage Option
- What Type of Furniture Should Go Into Storage?
- How Long Should You Store Furniture During Renovation?
- Your Pre-Renovation Furniture Storage Checklist
- The Smartest Renovation Move You Can Make
- Final Thought
- Frequently Asked Questions
There is a moment during almost every home renovation when the excitement disappears for a few minutes.
The contractor arrives. The walls are being opened up. The flooring is coming out. Boxes are everywhere. And suddenly you look at your sofa, dining table, bed, expensive rug and that one piece of furniture your family has had for years and think:
“Where is all this going to go?”
Most homeowners spend weeks deciding on tiles, paint colours, lighting and interiors, but surprisingly few plan where to store furniture during renovation.
And that’s a mistake.
Construction creates dust, debris, paint splashes, moisture and constant movement. Even furniture sitting in an adjacent room can be exposed to dust and accidental damage. Moving furniture out of the active work zone gives contractors more room to work and reduces the chances of your belongings becoming an unintended part of the renovation.
So, whether you’re renovating a single bedroom, upgrading your kitchen or completely transforming your home, here’s a practical home renovation storage playbook.
Why Should You Store Furniture During a Home Renovation?
Renovation dust isn’t ordinary household dust.
Cutting wood, sanding walls, drilling concrete, removing tiles and applying paint can generate fine particles that settle on furniture, upholstery and electronics. Moisture and accidental paint spills can create another layer of risk.
There’s also the simple problem of space.
A contractor needs clear access to walls, floors and work areas. Keeping a large sofa or dining table in the middle of the room makes the renovation harder and increases the likelihood of scratches, dents and accidental knocks.
That’s why temporary furniture storage during renovation isn’t just about keeping your home tidy.
It’s about protecting your belongings and making the renovation easier to execute.
Step 1: Decide What Actually Needs to Go Into Storage
You don’t necessarily need to store every item in your house.
Start with three categories:
- Move out: Furniture and belongings inside or immediately next to the renovation area.
- Keep at home: Essential everyday items that can safely remain in a clean, isolated room.
- Declutter: Items you haven’t used for months and don’t need during the renovation.
For a small bedroom renovation, moving the bed, wardrobe and study table may be enough. For a complete home remodel, however, keeping furniture inside the property may become impractical.
A useful rule is:
If contractors need the space, your furniture probably shouldn’t be there.
For whole-home renovations, off-site storage can be particularly useful because it removes the temptation to keep shifting furniture from one room to another.
Step 2: Clean Your Furniture Before Storage
This is one of the easiest steps to skip—and one you’ll regret skipping later.
Before storing furniture, clean it properly and allow it to dry completely.
Vacuum sofas and upholstered furniture, paying attention to gaps and corners. Wipe wooden surfaces appropriately and make sure there is no moisture left before wrapping or storing them.
Why?
Because storing dust, food particles or moisture with furniture for several weeks can create unpleasant odours and potentially encourage mould or pest problems.
Think of it like putting winter clothes away.
You wouldn’t pack a damp sweater and expect it to smell fresh three months later.
Your furniture deserves the same preparation.
Step 3: Disassemble What You Can
Large furniture takes up significantly more space when stored fully assembled.
Where practical, dismantle beds, dining tables, shelving units and modular furniture.
Keep screws, bolts and fittings together in labelled bags and attach them to the relevant furniture piece. Take photos before dismantling complicated items.
This tiny step can save you an enormous headache when the renovation is finally finished.
And there’s another advantage: smaller pieces are generally easier to move through doorways and transport safely. Storage experts similarly recommend disassembling larger furniture wherever practical.
Step 4: Don't Wrap Everything in Plastic and Forget About It
Plastic covers are useful for protecting furniture during transportation and short-term exposure to dust.
But long-term storage requires more thought.
For upholstered furniture, breathable covers can help prevent moisture from becoming trapped against fabric. Experts recommend avoiding situations where non-breathable plastic remains tightly wrapped around furniture for extended periods because condensation can create problems.
For wooden furniture, use appropriate protective padding and covers, and avoid placing pieces directly on a potentially damp floor.
The objective isn’t simply:
“Cover everything.”
It’s:
“Protect every material appropriately.”
Step 5: Keep Furniture Off the Floor
This is particularly important when furniture is going into storage for several weeks or months.
Using pallets or another suitable raised surface can help keep furniture away from direct floor contact and reduce exposure to potential moisture.
Don’t push every item tightly against the walls either. Leaving some breathing room can make it easier to access your belongings and improve airflow around stored items.
And avoid creating a giant furniture puzzle where the item you need is buried underneath six other pieces.
Leave an accessible pathway whenever possible.
Step 6: Choose the Right Furniture Storage Option
This is where homeowners usually have three choices.
Option 1: Store Furniture in Another Room
This can work for a small renovation.
If you’re repainting one bedroom, for example, you might temporarily move the furniture into another room.
However, construction dust can travel, particularly during sanding, drilling or demolition.
So cover furniture and isolate the storage room as much as possible.
Option 2: Garage or Temporary Outdoor Space
A garage may seem like the obvious answer, but garages can experience temperature and humidity fluctuations. They can also become crowded with renovation materials, tools and equipment.
Outdoor storage is generally a poor choice for valuable furniture unless it is specifically designed and protected for that purpose.
Option 3: Professional Furniture Storage
For larger renovations, temporary furniture storage can be the easiest option.
Instead of constantly moving furniture around your home, you move it once into a dedicated storage facility and bring it back when the renovation is complete.
For example, Xtended Space offers furniture storage specifically for situations such as home renovation and relocation, with pickup and delivery, 24/7 CCTV surveillance, restricted access, barcode tracking and insurance coverage.
This is particularly useful when your renovation is expected to last several weeks or when multiple rooms are involved.
What Type of Furniture Should Go Into Storage?
Almost anything that is difficult to protect inside an active construction zone can potentially benefit from proper storage.
This includes:
- Sofas and chairs: Protect upholstery from dust, paint and accidental spills.
- Beds and mattresses: Keep them away from construction dust and moisture.
- Dining tables: Protect wooden and polished surfaces from scratches.
- Wardrobes and cabinets: Empty and disassemble them where practical.
- Office furniture: Desks and chairs can take up valuable renovation space.
- Rugs and soft furnishings: These can trap dust and construction odours surprisingly easily.
Xtended Space specifically provides storage for sofas, chairs, beds, mattresses, dining tables, office desks and modular units.
How Long Should You Store Furniture During Renovation?
This depends entirely on the renovation.
For a small painting project, you may need storage for only a few days.
For a kitchen or bathroom renovation, it could be several weeks.
For a complete home renovation, temporary storage may be needed for a few months.
The important thing is to avoid bringing furniture back simply because the major construction appears finished.
Wait until dust-producing work, painting and major installation are completed, then clean the space thoroughly before moving everything back.
Otherwise, your freshly cleaned sofa could become a dust collector all over again.
Your Pre-Renovation Furniture Storage Checklist
Before your contractor starts, take five minutes to check:
☐ Photograph valuable furniture
☐ Create a simple inventory
☐ Clean and completely dry furniture
☐ Disassemble larger pieces where possible
☐ Label screws and components
☐ Use suitable protective covers
☐ Keep furniture elevated from the floor
☐ Choose a secure storage location
☐ Check insurance/coverage terms
☐ Keep an accessible inventory of stored items
☐ Schedule pickup before demolition begins
☐ Bring furniture back only after final cleaning
Creating an inventory with photographs is also useful for keeping track of belongings and documenting their condition before storage.
The Smartest Renovation Move You Can Make
Home renovation is supposed to end with a better home—not a collection of damaged furniture.
If you’re renovating one small area, you may be able to protect your belongings inside another room. But when the renovation gets bigger, professional furniture storage during renovation can remove a huge amount of stress.
Instead of moving your sofa three times, squeezing a dining table into a bedroom and hoping your mattress survives a layer of construction dust, move your furniture somewhere designed for storage.
That’s exactly where Xtended Space can help.
Xtended Space provides furniture storage solutions for renovation, relocation and decluttering, including pickup and delivery and secure monitored storage.
Final Thought
A renovation already comes with enough decisions.
Don’t add “How do I rescue my sofa from construction dust?” to the list.
Plan your furniture storage before the first wall is drilled, the first tile is removed or the first coat of paint goes on.
Your future, renovated home—and your furniture—will thank you.
Xtended Space — More room for what matters.
Frequently Asked Questions
1. Where should I store furniture during a home renovation?
For smaller renovations, a clean spare room may work. For larger projects, professional off-site furniture storage can provide more space and reduce exposure to construction dust, debris and accidental damage.
2. How do I protect furniture during renovation?
Clean and dry furniture first, dismantle large pieces where practical, use suitable protective covers, keep furniture away from active work zones and consider professional storage for major renovations.
3. Can I leave my sofa in the house during renovation?
You can if it is completely isolated from the work area, but moving it out is generally safer during demolition, sanding, painting or other dust-heavy work.
4. Is plastic wrapping good for furniture storage?
Plastic can provide useful short-term protection, particularly during transportation, but tightly wrapping furniture in non-breathable plastic for long periods can trap moisture. Breathable protection may be preferable for extended storage.
5. Should furniture be stored off the floor?
Yes. Raising furniture or using suitable pallets can help reduce direct exposure to floor moisture and makes storage more organized.
6. Is professional furniture storage worth it during renovation?
For larger or longer renovations, it can be worthwhile because it clears work areas, reduces repeated moving and gives furniture a dedicated storage environment.
7. How long can furniture stay in storage?
Furniture can be stored for short or extended periods, depending on the storage facility, furniture material and storage conditions. Always follow the facility’s specific guidelines.
8. Should I clean furniture before putting it in storage?
Absolutely. Cleaning and completely drying furniture before storage helps prevent dirt, odours and moisture-related problems.
9. Can I store a mattress during renovation?
Yes. A mattress should be thoroughly cleaned and completely dry before storage and protected appropriately. Avoid storing it directly on a potentially damp floor.
10. What is the easiest way to store furniture during a full-home renovation?
For a major renovation, moving furniture into secure professional storage before construction begins is often the simplest approach. It gives contractors clear access and keeps your belongings away from the construction environment.